This walkthrough forks a Stadia Maps style, recolors the background, water, road, and label layers in Maputnik, exports the JSON, and hosts it as a static file. It covers domain-based authentication versus API keys for production, and answers some of the failures developers hit most: blank maps caused by a 401 response; road layers that only partly change color because roads are split across layers by class; and palettes that break at higher zoom levels.
Your app has a design system, but your map doesn't match it.
Maybe the roads are the wrong shade of gray, the labels compete with your UI, or the entire basemap is louder than the data you're trying to put on top of it. You don't need a different map provider. You just need it to look like it belongs in your app.
A MapLibre style is just a JSON file, so customizing a map shouldn't be a design problem. It should be a file you edit, review, and deploy like any other asset in your repo.
What You'll End Up With
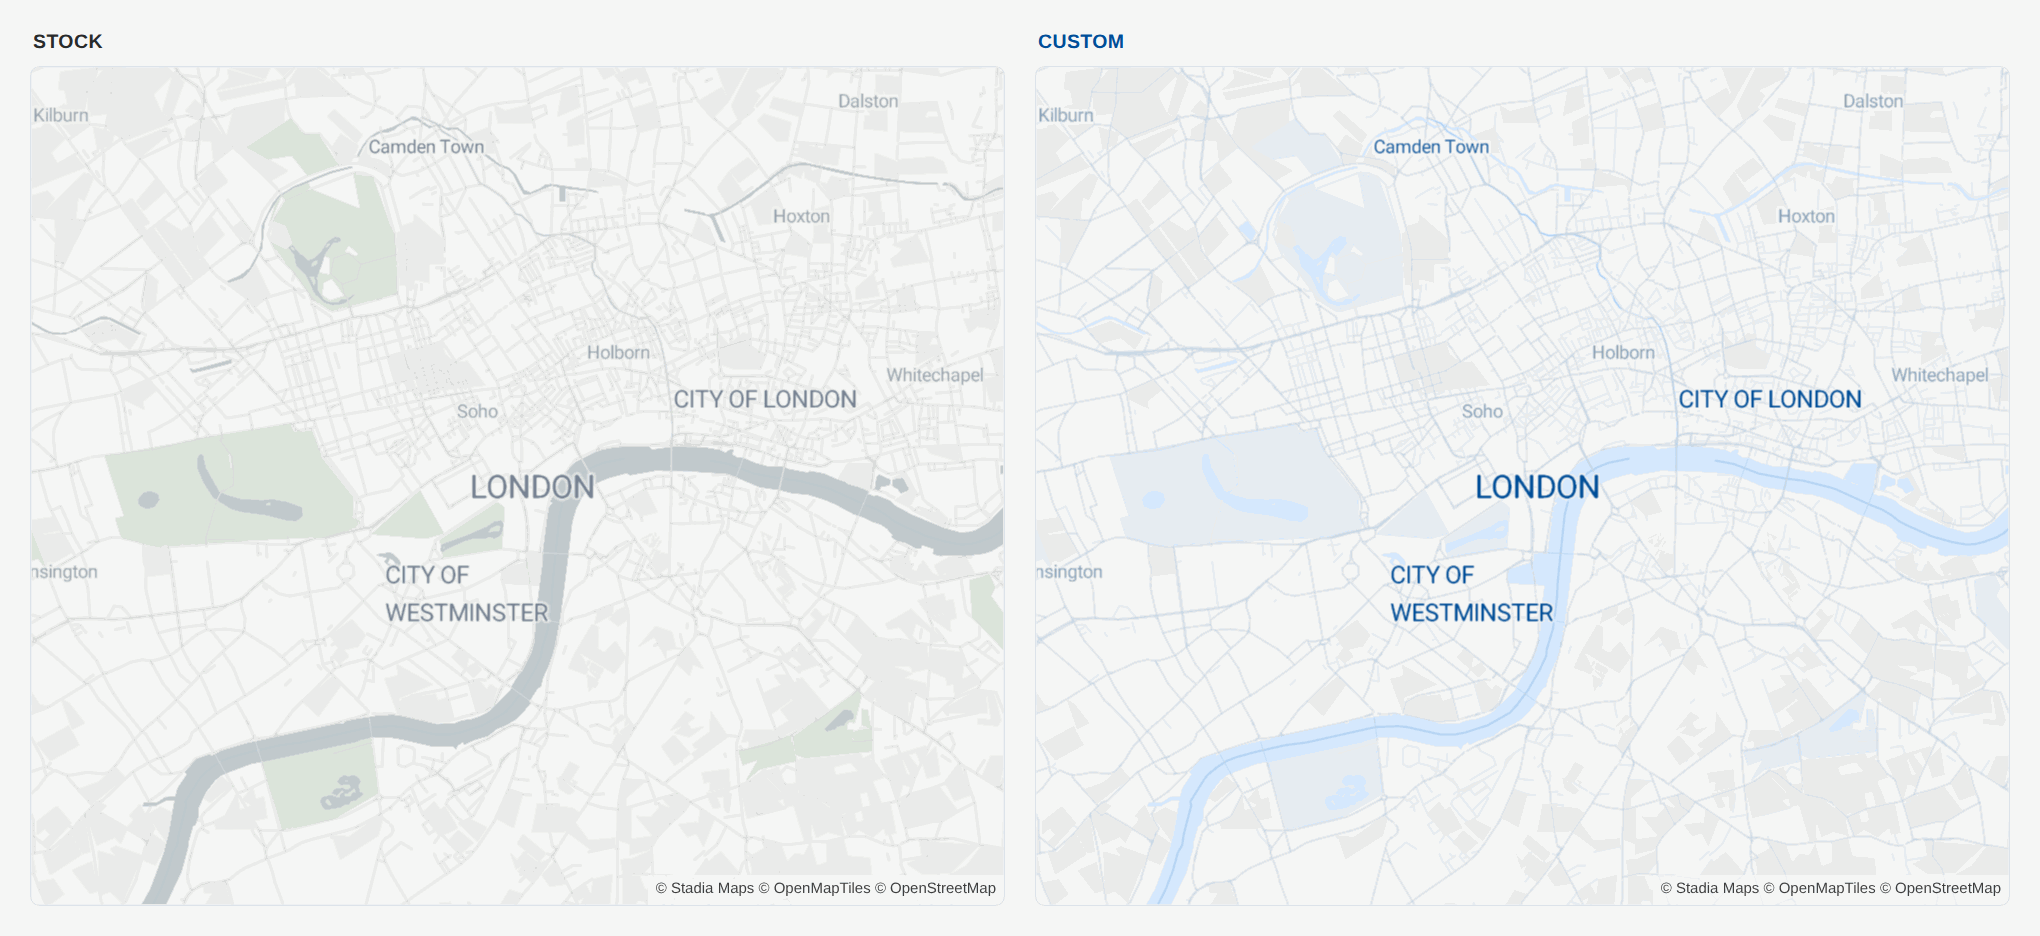
In about 30 minutes, you'll have an interactive map that uses your full brand palette: your background color, your road hierarchy, and your label treatment. A single JSON file you host yourself, loaded by a few lines of MapLibre GL JS. The end result will look something like this:
Start With a Working Map
To get started, all you need is a browser, a Stadia Maps account, and somewhere to serve a static file.
Open our Build a Map tool (which doesn't require your Stadia Maps login). It's a style picker, not a style editor. The color changes happen in the next step.
Use the tool to display a working map with your preferred map style and generate the code to load it. Styles include Alidade Bright, Alidade Smooth, Alidade Smooth Dark, Alidade Satellite, Outdoors, OSM Bright, Stamen Terrain, Stamen Toner, Stamen Toner Lite, Stamen Toner Dark, Stamen Toner Blacklite, and Stamen Watercolor.
If you don't know which style to choose, start with Alidade Smooth, which is designed for maps with a lot of markers or overlays. Its muted palette leaves you room to work. Forking a finished style also beats starting from an empty one, because you inherit years of cartographic decisions about what to show at which zoom level.
Set your latitude, longitude, and zoom to frame a place you know well. You'll be judging color changes against it, so pick a spot where you'll notice when the roads look wrong.
Next, click the Try it in JSFiddle button. You now have a working interactive map. The generated code looks like this (London is used in this example):
// This is a quick sample to get you started with an interactive map.

// 1. Set up the map control.
var map = new maplibregl.Map({
    container: 'map',
    style: 'https://tiles.stadiamaps.com/styles/alidade_smooth.json',  // 2. Style URL; see our https://docs.stadiamaps.com/themes/ for more options
    // You can also explicitly request tiles from our EU servers using the following URL:
    // https://tiles-eu.stadiamaps.com/styles/alidade_smooth.json
    center: { lat: 51.5072, lng: -0.1276 },  // 3. Initial focus coordinate
    zoom: 7,  // 4. Initial zoom
});
The HTML pane loads MapLibre GL JS and its stylesheet, and the JavaScript pane adds a setRTLTextPlugin call, so right-to-left labels render correctly. Keep this tab open. That style line is the only one you'll change at the end.
If your users are in the EU and you want tiles served from EU infrastructure, the code notes the alternative endpoint: https://tiles-eu.stadiamaps.com/styles/alidade_smooth.json.
You have a map, and you know which line controls its appearance. Next, you'll change what that line points to.
Customize the Style in Maputnik
Maputnik runs in the browser. It's free and open source, and it edits the same JSON your map already loads.
Open your starting style. In the Maputnik menu bar, choose Open, then enter the JSON URL for the style you picked. For Alidade Smooth, that's https://tiles.stadiamaps.com/styles/alidade_smooth.json. The full list lives in our style library documentation.
Find the layers that matter. A production basemap has many layers, but these are the most important to focus on:
- Background and landcover, basically the base color everything sits on
- Water, usually the strongest color contrast on the map
- Roads, split across several layers by class, which is why changing "the road color" means changing more than one thing
- Labels, including text color, halo color, and font
Use Maputnik's layer filter to search by name instead of scrolling. Change the background first and let it set the range everything else has to work within.
Match your palette and check your contrast. Paste in your brand hex values, then zoom from country level to street level. Colors that look right at zoom 7 often fall apart at zoom 15, when more layers switch on at their minzoom thresholds. Check the label text against the WCAG minimum of 4.5:1 while you're here, since a palette that passes on a white page can fail over landcover fills. Most of the time, what you spend here determines whether a map looks branded or broken.
Check the attribution requirements for the style you pick. Keep in mind that Stamen styles carry their own license terms for commercial use and remixing. Also, Stamen Watercolor is a raster style, so it isn't vector-styleable.
Click Export in the top menu and save the JSON. If you'll be loading tiles with an API key, which covers mobile apps, server-side rendering, and anything outside a browser, enter your API key in the export dialog, and Maputnik writes it into the style for you.
You now have your style as a file. All that's left is putting it somewhere your app can reach.
Host Your Style and Ship It
Some mapping platforms keep your style on their servers, so this step never comes up. We hand you the file instead. Your style is a portable artifact you own: you can diff it, review it in a pull request, roll it back, bundle it offline, and take it with you. It's a design asset in your repository, not a row in someone else's database.
Host the exported JSON anywhere you serve static files: your own server, a CDN, or bundled inside your app.
Point your map at it. Go back to that JSFiddle tab and change one line:
var map = new maplibregl.Map({
    container: 'map',
    style: 'https://yourdomain.com/styles/your-custom-style.json',  // your style now
    center: { lat: 51.5072, lng: -0.1276 },
    zoom: 7,
});
Reload.
Set up authentication before you go live. For production websites, register your domain in the Stadia Maps dashboard and use domain-based authentication to keep API keys out of your client code. For mobile apps, server-side code, and intranet sites, use an API key. Local development on localhost requires no authentication, which is why your fiddle worked immediately.
Troubleshooting and Common Questions
Why is my map blank after switching to my custom style?
Check the browser console. A blank map with a 401 response is an authentication issue. Either your domain isn't registered yet, or your API key didn't make it into the style. A blank map with no network errors usually indicates a malformed export or an invalid style URL.
Why didn't some layers change color?
Roads and labels are split across multiple layers by class and zoom level, so changing one road layer changes only one road class. Filter the layer list by name and check for siblings.
Why do my colors look right at low zoom but wrong at high zoom levels?
Layers switch on as you zoom in, and some properties use zoom-dependent expressions rather than fixed values. Test every color change across the full zoom range before committing to it.
Do I have to re-export when the base style is updated?
Your exported style is a snapshot. It keeps working as-is, but it won't automatically pick up upstream improvements. When an update ships that you want, re-fork and reapply your changes, which is much faster if your palette is documented in your repository.
Can I use custom icons and fonts?
Yes, though both take more setup than anything else here. Generate sprite files with Spreet, host them yourself, and point your style's sprite key at them. Our docs cover the details, including why the URL leaves off the file extension. For fonts, generate glyphs with our own build_pbf_glyphs or MapLibre Font Maker; the font docs explain how to combine scripts into a single stack with fallbacks. Check the license on anything you ship.
Take the Next Step
You now have a branded basemap and a repeatable process for changing it. From here, the natural next steps are adding your own data layers on top, swapping in custom marker sprites, or building a dark variant from the same palette. Our custom styling documentation goes deeper on sprites and glyphs when you're ready.
Ready to get started with Stadia Maps for free? Every new account includes a 14-day trial of Stadia Maps Professional, and we don't require a credit card when you sign up. Need help? Reach out to our Support team at any time.